

3 Easy Egg-Free Elimination Diet Breakfast Ideas
Here are three of my favorite egg-free breakfast options that are great to eat while on an elimination diet or whenever you have to eliminate eggs from your diet because of an allergy, sensitivity or other gut health issue.

So many of us start our day with a big plate of eggs, and if you are like me, you also have a little avocado toast too. It’s easy to get stuck in a rut of eating the same meal over and over, so it can get a little confusing about what to eat when it’s time to start an elimination diet and you are removing eggs for a short time.
In the past, I've gotten several questions on how to eat an egg-free breakfast during the 30-Day Beat Belly Bloat program, where we use the elimination diet to discover your flat belly blueprint.
There are so many other great breakfast options available that are equally delicious and filling! There is one thing we NEVER do during the program, and that is starve. We believe only in nourishing your body so you can discover foods that may be causing inflammation and preventing you from losing fat. So I want to share three of my favorite egg-free breakfast options that are great to eat while on an elimination diet.

But first, what is the elimination diet?
The Elimination Diet is an approach used by the Functional Medicine community, health practitioners, and nutritionists to figure out which foods you have a food sensitivity or food intolerance to. This is done by eating an anti-inflammatory diet, removing a specific group of foods such as corn, gluten, eggs, soy, dairy, etc. that are known to cause issues, allowing the body to remove any symptoms it may have. Later, you reintroduce these foods one at a time to note any reactions, creating a personalized eating plan.
Having this information about your individual health is important to understand so that you can eat mindfully, keep your digestive symptoms at bay, start healing your gut, and lose fat. So many benefits!
3 Easy Egg-Free Elimination Diet Breakfast Ideas:

The oatmeal breakfast bowl - my personal favorite for a hearty breakfast!
1/2 cup gluten-free rolled oats (sprouted oats are best for digestability)
cinnamon to taste
dash salt
stevia to taste
1 Tbsp nut butter (sunflower butter or almond - if not eliminating tree nuts)
1/2 serving walnuts (15g)
1 banana
2 servings grass-fed collagen
optional 1 Tbsp cacao nibs
In a bowl, add 1/2 cup rolled oats, a dash of salt and 1 cup of water. Cook oatmeal on the stove or in the microwave according to the oatmeal package. Once cooked, stir in collagen and stevia then top with additional toppings. You can also make as overnight oats to make life even easier. Get creative with it!

Struggling to find egg-free recipes that actually taste good? Whether you're on an elimination diet, have an egg sensitivity, or just want more variety in your meals, this cookbook has you covered!
What’s Inside?
✔ Tasty, egg-free recipes for every meal
✔ Simple ingredients
✔ Balanced macros to help you hit your nutrition goals
📊 BONUS:
For those interested, the caloric and macro (carbs, fat, and protein) values are estimated—but I’ll show you how to calculate your exact breakdown using an app like Cronometer!
🥄 Start cooking with confidence today! 🥄

Berry Banana Protein Smoothie:
1-2 scoops protein powder (I love chocolate Designs for Sport: Beef Protein in chocolate (use code AWAKENED10 for 10% off using my affiliate link)
1/2-1 Tbsp apple cider vinegar
2 Tbsp. nut butter (sugar-free sunbutter or raw almond butter)
1/2 cup blueberries
1/3 cup strawberries
1/2 or whole banana
stevia to taste (I like NOW Foods brand)
1 cup unsweetened almond or coconut milk
Optional: 1 Tbsp cacao nibs
Blend well, and enjoy! Make sure to chew your smoothie to get your digestive enzymes working!
Chicken Sweet Italian Sausage and Sweet Potato:
1 organic chicken sausage link cut into slices (check for minimal ingredients, free of dairy, gluten and soy) - we like the Sabatinos Paleo Chicken sausage from Costco
1/2 sliced bell pepper
1 medium sweet potato
1/2 Tbsp avocado oil + more for sautéing or use avocado oil spray
salt and pepper to taste + add any other herbs for sautéing the bell peppers
In a small skillet, add 1/2 Tbsp of avocado oil on medium heat. Add sliced bell pepper, salt, pepper, and thyme, sauté for about a minute. Then add sliced chicken sausage and sauté in a pan until both sides are brown. Once cooked, remove from heat and add to plate.
Wash sweet potatoes, either microwave them in a dish with a little water and cover with a wet paper towel, or if you have time, bake them in the oven at 400 degrees for about 45 minutes. Once the potato is fully cooked, slice open the top and add avocado or extra virgin olive oil, salt, and pepper.
Other optional additions are sauteed mushrooms, tomatoes, butternut squash, spinach, or avocado. Get creative with it and enjoy!
Struggling to find egg-free recipes that actually taste good? Whether you're on an elimination diet, have an egg sensitivity, or just want more variety in your meals, this cookbook has you covered!
What’s Inside?
✔ Tasty, egg-free recipes for every meal
✔ Simple ingredients
✔ Balanced macros to help you hit your nutrition goals
📊 BONUS:
For those interested, the caloric and macro (carbs, fat, and protein) values are estimated—but I’ll show you how to calculate your exact breakdown using an app like Cronometer!
🥄 Start cooking with confidence today! 🥄
So there you have it! Three of my favorite egg-free breakfasts that are sure to taste amazing plus keep you feeling full while doing the elimination diet!
One thing to remember is that elimination diets are very customizable for each individual so just be sure to check to make sure you are allowed to eat the ingredients in these meals before you start cooking!
Leave a comment below and let me know which breakfast idea is your favorite or share your favorite breakfast!

Learn How to Stop Bloat From Happening
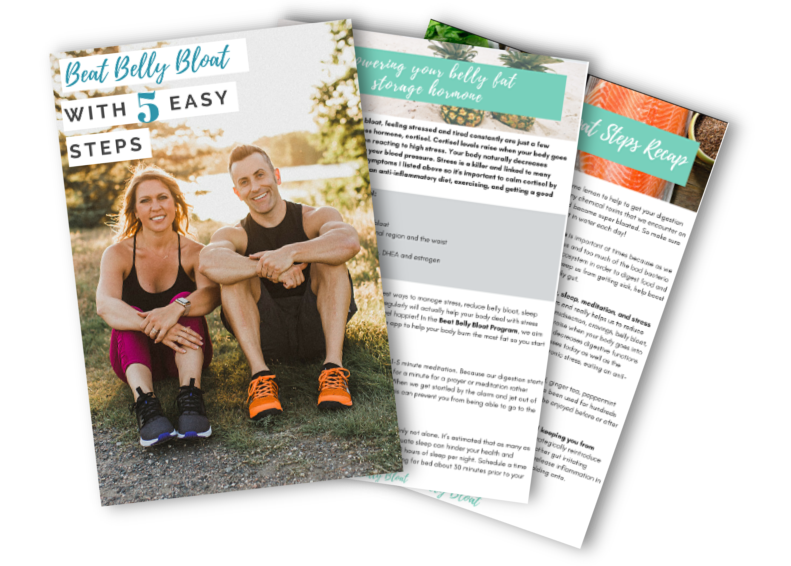
Want to reduce inflammation and lose fat for good? Start by downloading our free guide: 5 Easy Steps to Beating Belly Bloat!
We are Chris and Amber, a husband and wife team dedicated to helping you improve your nutritional and personal fitness habits for a better lifestyle. If you have issues with bloating, inability to lose fat, brain fog, or are in need of a proven nutrition and fitness plan to get you out of a rut, then sign up for our 30-Day Beat Belly Bloat Program today!


Dairy-Free Pumpkin Pie Protein Shake (soy-free)
This is an easy-to-make, high-protein pumpkin pie smoothie that is dairy-free and tastes amazing! It’s packed with gut health-boosting collagen, healthy fats and has 37g of protein (or more depending which brand of collagen you use)!
This is an easy-to-make, high-protein pumpkin pie smoothie that will give you all the fall vibes! It’s packed with gut health-boosting collagen, healthy fats and has 37g of protein (or more depending which brand of collagen you use)!
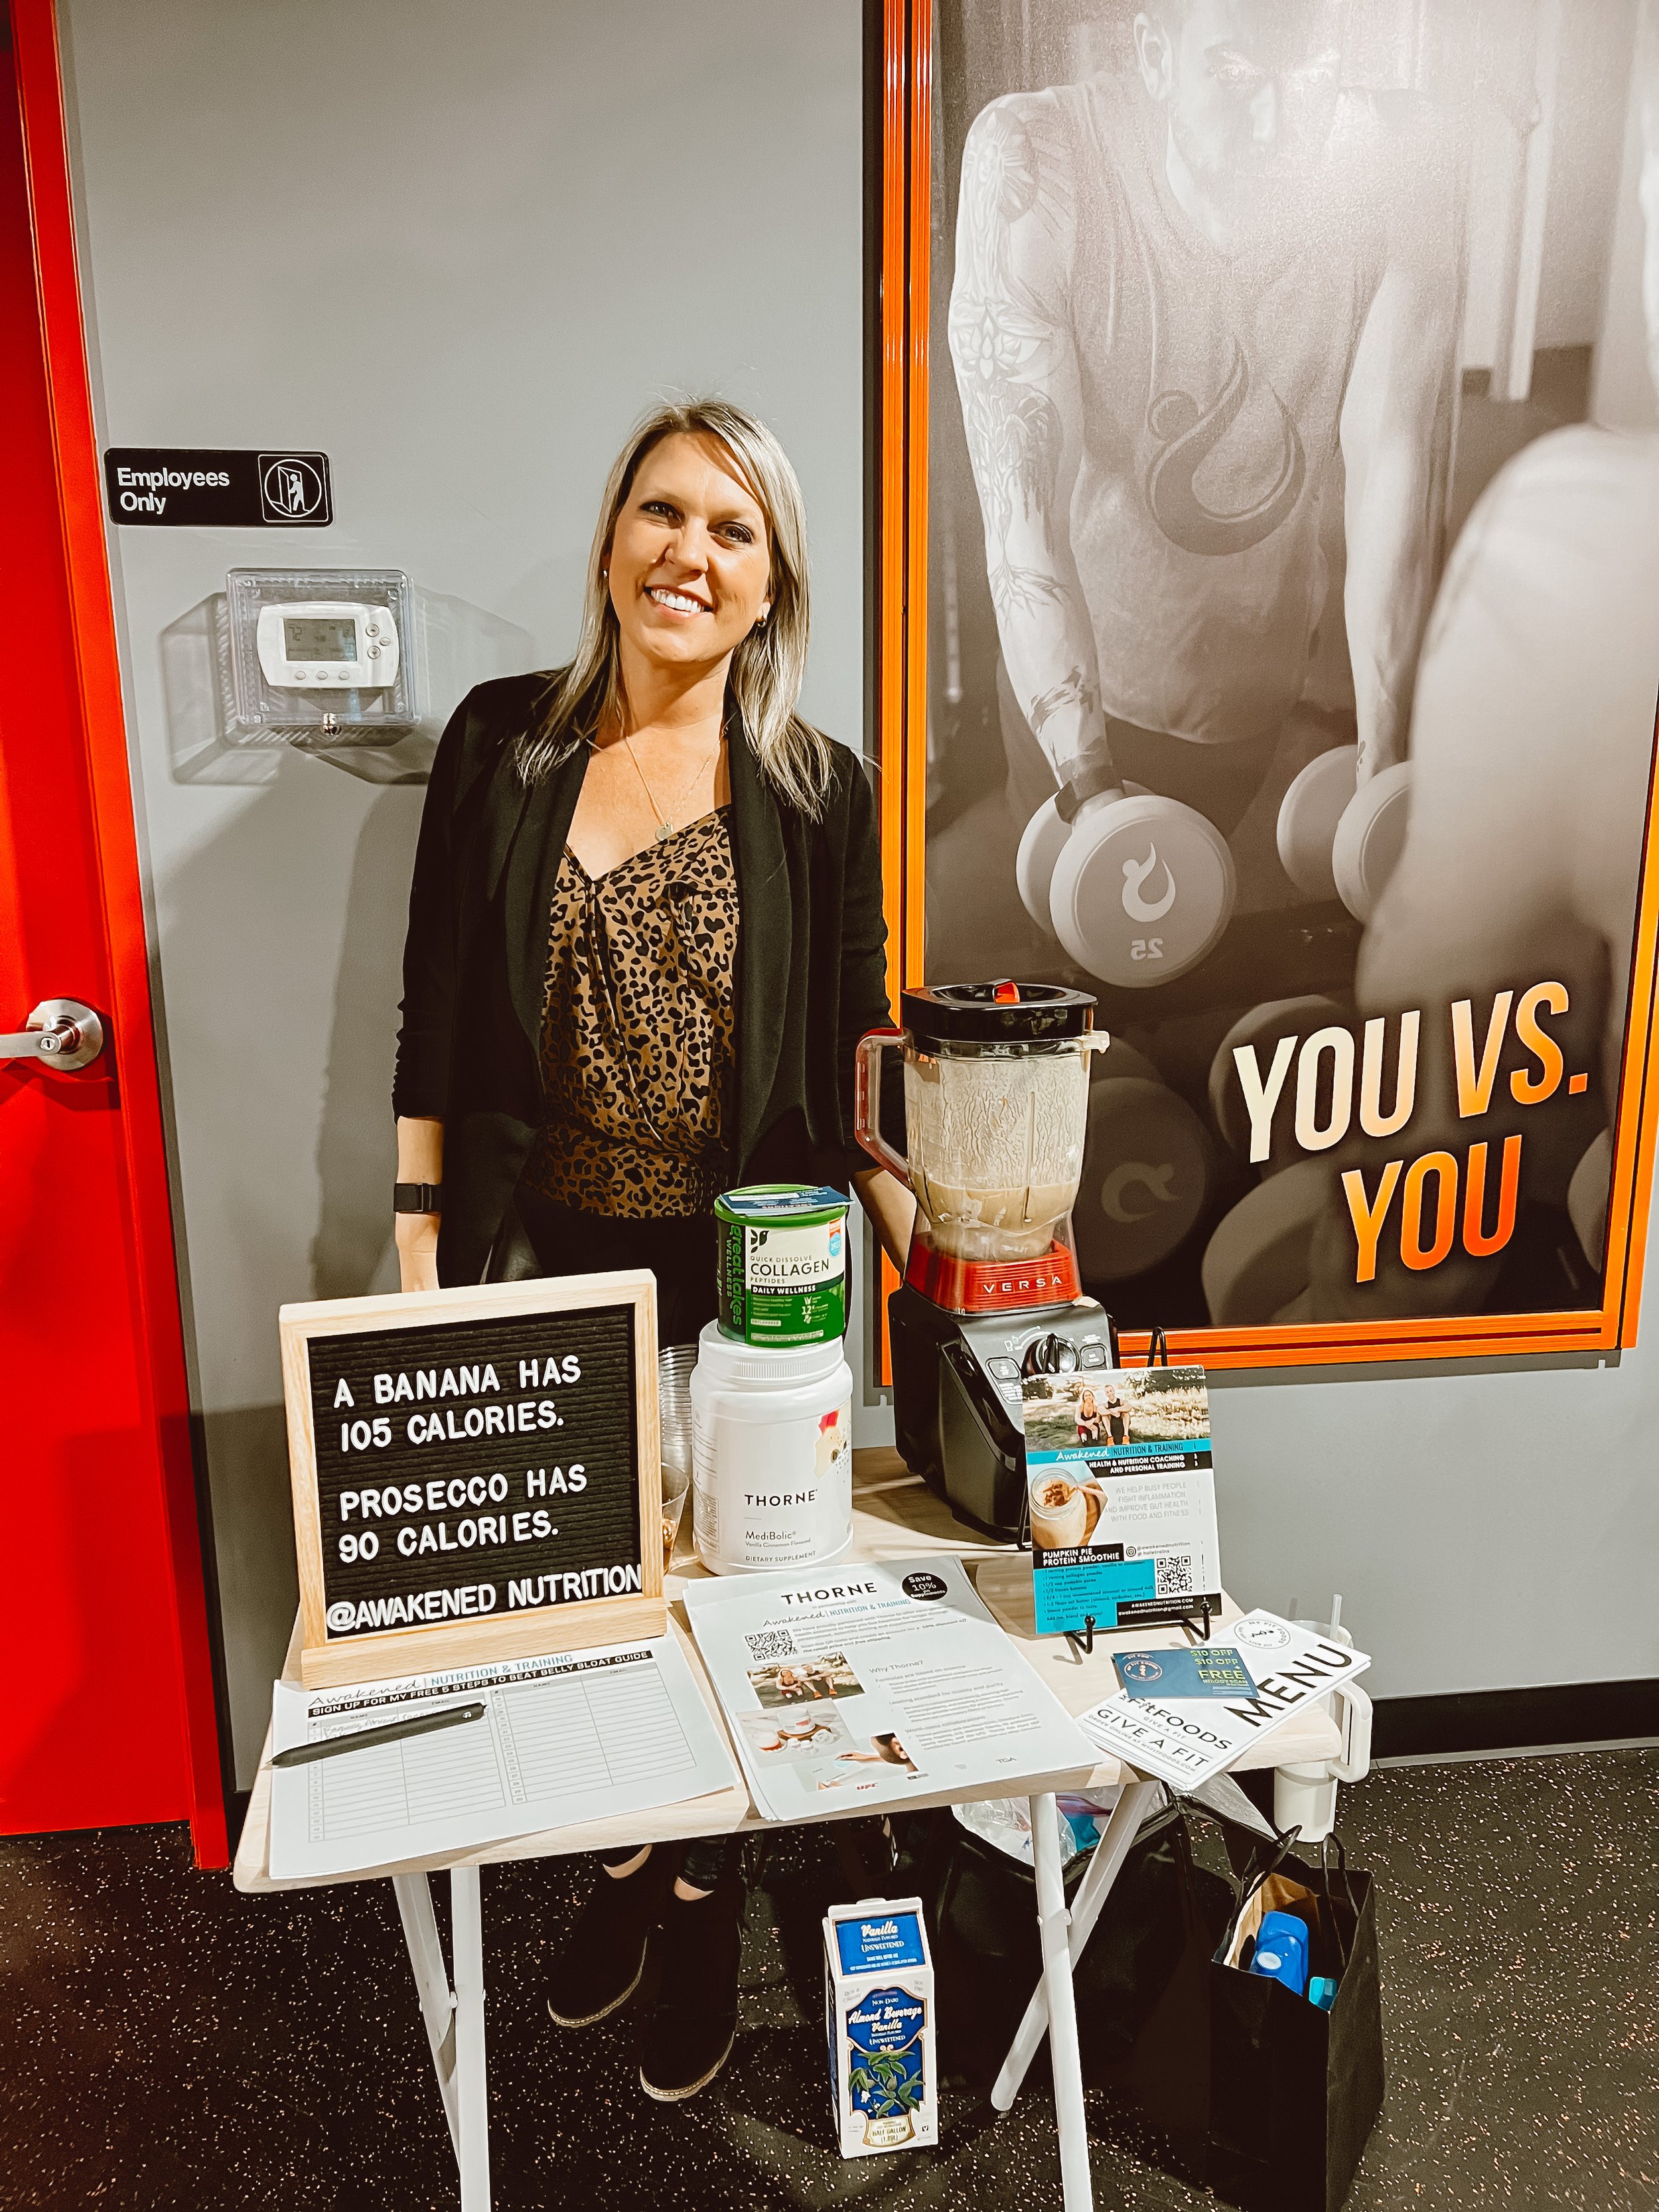
This fall, I was invited to a member appreciation night at my local Hotworx where all of us health practitioners and beauty vendors were able to share our services with other members. I whipped up this pumpkin protein shake recipe to serve to members who were just getting done with their workouts and it was a huge hit!
Everyone was blown away by how delicious it tasted. I think one thing that made this pumpkin protein smoothie such a hit is that it actually tastes like pumpkin, and even though it does have half a banana, you can’t taste it at all.
I loved sharing this smoothie with my fellow gym goers so they could see how to get a high amount of supplemental protein in a meal with a smoothie. This smoothie would be great for breakfast, as a snack, or pre or post-workout meal.
Why do we need to eat enough protein daily? Protein is vital to good health, it’s often called the building block of life and for good reason…you literally can’t survive without it. Protein is in every cell of your body and it’s critical that you have enough each day for your body to build and repair cells. Protein is also an important component of your bones, muscles, tendons, cartilage, skin, blood and more.
Having a high protein intake per day is important overall but especially as you age because you now have a much higher protein requirement to maintain muscle mass - mainly because your system is no longer dominated by hormones like when you were young. Yet many people eat much lower amounts of protein as they age because they look at it negatively for various reasons (or appetite decreases over time), rather than them looking at the massive benefits that protein provides.
The goal as you age is to maximize muscle protein synthesis so that you can preserve lean tissue - over time, it will help with strength, bone health and other essential functions keeping you mobile and balanced.
What makes protein so special? Protein is an essential nutrient that is made up of 20 building blocks known as amino acids. 9 of the 20 are essential amino acids meaning the body cannot make them on its own and we must get them from quality protein sources in our diet. The other 11 amino acids can be created by the body, making them non-essential amino acids.
We must obtain the 9 essential amino acids from mainly animal and some plant sources…but it’s important to note that most plant proteins are not a “complete protein” and are not as bioavailable as animal proteins due to the amino acid profile, as well as issues with digestion and absorption. Because of this, you essentially need to just about double the amount of plant proteins to get enough quality protein your body can utilize.
This shake is made up mostly of plant proteins, as well as protein from bovine collagen so it provides MOST of the essential amino acids. But have no fear, because if you have a well-rounded diet of mainly animal proteins mixed with some plant protein, you should be able to achieve the amount of protein and essential amino acids to achieve your daily needs.
Before we get to this recipe, you’re probably wondering how you can insure that you are getting enough protein per day. The studies that look at protein intake and gaining muscle mass vary from 0.8-1.0+ gram per pound bodyweight, so it’s safe to say a balanced approach would be most beneficial, so around 1g per pound bodyweight is highly effective.

High Protein Pumpkin Pie Protein Shake (soy-free & dairy-free)
1 serving protein powder, such as Thorne MediBolic Cinnamon (18g of protein) or Designs for Sport Beef Protein Vanilla Use affiliate code AWAKENED10 for 10% off (21g of protein - If you choose a vanilla protein powder, add cinnamon to the smoothie)
1 serving Great Lakes collagen powder (11g of protein) or Vital Collagen (18g of protein)
1/2 cup pumpkin puree
1/2 frozen banana
3/4 cup unsweetened coconut or almond milk
1-2 Tbsps nut butter (almond butter, sunflower butter, etc.)
Stevia powder to taste
Add ice, blend and enjoy!


Disclaimer: I earn a small commission if you use some of the highlighted links to purchase products mentioned in this blog/website. I recommend only products that I would use my own home or that I would recommend to clients.
Amazon Disclaimer: We are a participant in the Amazon Services LLC Associates Program, an affiliate advertising program designed to provide a means for us to earn fees by linking to Amazon.com and affiliated sites.

Healthy Chocolate Chip Pumpkin Pancakes (Soy, Dairy & Gluten-Free)
Try this heart-healthy soy, dairy and gluten-free pumpkin pancake recipe that tastes so deceivably good, you won’t believe they are healthy!
February is that time of the year when love is in the air and hearts are all a flutter! Not only is it centered around love because of Valentine’s Day, but it’s also American Heart Month! Some of the top ways to keep your heart health in check is by exercising regularly and eating a healthy diet to help you maintain a healthy weight, lower cholesterol and blood pressure. Unfortunately, there is a lot of misconception about healthy food tasting bland and boring. I know when most people think of heart-healthy foods, pancakes are not usually the first foods that come to mind. Well, that all changes now!
Some of my favorite recipes to make in the kitchen are pancakes that taste so deceivably good, you won’t believe they are healthy! You may already have many heart-healthy ingredients in your pantry and not even know it.

Here are some heart-healthy ingredient that I love:
Coconut oil like the cold-pressed unrefined organic coconut oil from Kelapo has many amazing health benefits and tastes delicious! It contains Medium Chain Triglycerides (MCTs) which are digested much quicker than any other fats. MCT’s are absorbed directly in the liver, provide sustainable energy throughout the day, and promote weight loss by helping to increase metabolism. Studies have also shown that supplementing with coconut oil daily can increase HDL (good cholesterol) and reduce belly fat!
Read: 4 Healthy Cooking Oils You Should Be Using In The Kitchen
Dark Chocolate is bursting with flavor and full of antioxidants which help to prevent your body from being damaged by free radicals from toxins in our everyday environment. Also, eating moderate amounts of flavanol-rich dark chocolate can lower blood pressure, improve blood flow to your heart and brain, and has a blood-thinning effect, which can benefit cardiovascular health.
Nuts are not only delicious and make a deliciously healthy snack, but they are also great for lowering LDL (bad cholesterol), one of the top offenders for causing heart disease. Nuts are full of heart-healthy monounsaturated fats which directly lower bad cholesterol, Omega-3 fatty acids that prevent dangerous heart rhythms that can lead to heart attacks, fiber which helps to keep you full while lowering cholesterol, Vitamin E which may help keep your arteries plaque-free which can lead to heart attacks and other heart complications, and L-arginine which may help to improve the health of your artery walls making them flexible and less prone to blood clotting.
Eggs are a perfect food to eat any time of the day! Sadly they were once vilified because of the high cholesterol content in the yolks, but studies have shown that the cholesterol from eggs does not have an adverse effect on blood lipids. They do, however, include many nutrients including protein, antioxidants vitamins B12 and D, riboflavin, and folate, which may help to lower the risk for heart disease.
Pumpkin is a great low-calorie, high-fiber food to add to your diet and especially while baking! They are a good source of vitamins and minerals, especially beta-carotene, vitamin C, and potassium which have all been linked to fighting heart disease.

Dark Chocolate Chip Pumpkin Pancakes (Soy, Dairy & Gluten-Free)
Makes 3-5 small pancakes
2 Tbsp Almond flour
2 tsp Coconut Flour
½ Tbsp Kelapo Coconut Oil plus ½ Tbsp for the pan
2 large eggs
1/2 cup pumpkin puree
1 Tbsp almond milk
1 tsp vanilla extract
1 tsp cinnamon
1/4 tsp pumpkin spice
1 Tbsp honey or stevia to taste
dash of baking soda
Optional ingredients:
chopped almonds, walnuts or pecans
Mix all dry ingredients together in a bowl. Mix all wet ingredients together in a separate bowl, if coconut oil has hardened then microwave for about 20 seconds until liquid. Once both bowls are mixed, combine into one bowl and mix well.
Set your stove to medium to medium-low heat, preheat the skillet or pancake pan. Once the pan is warm, toss in a half Tbsp of Kelapo extra virgin coconut oil or coconut oil spray to coat the pan. Pour the batter into the pan, makes about 3-5 small cakes, cook pancakes for a couple minutes on both sides until golden brown, flipping once. Top with maple syrup, coconut oil or almond butter. Bon Appétit!
What are some of your favorite heart-healthy ingredients to cook with?
This post has been updated and was originally posted as a guest post on Kelapo Coconut Cooking Oil’s blog in 2014
Learn How to Stop Bloat From Happening
Want to reduce inflammation and lose fat for good? Start by downloading our free guide: 5 Easy Steps to Beating Belly Bloat!
We are Chris and Amber, a husband and wife team dedicated to helping you improve your nutritional and personal fitness habits for a better lifestyle. If you have issues with bloating, inability to lose fat, brain fog, or are in need of a proven nutrition and fitness plan to get you out of a rut, then sign up for our 30-Day Beat Belly Bloat Program today!

Disclaimer: I earn a small commission if you use some of the highlighted links to purchase products mentioned in this blog/website. I recommend only products that I would use my own home or that I would recommend to clients.
Amazon Disclaimer: We are a participant in the Amazon Services LLC Associates Program, an affiliate advertising program designed to provide a means for us to earn fees by linking to Amazon.com and affiliated sites.

Easy Weekly Meal Prep: Instant Pot Salsa Shredded Chicken
Learn how to make this easy Instant Pot salsa shredded chicken and get some ideas on how to incorporate it into lunch and dinner dishes.

This post contains affiliate links meaning we earn a commission if you use those links.
Confession time!! I don’t think I’ve used our oven since cooking Christmas dinner (yes, we are in April now 😜) and I’m totally ok with that!

One practice that Chris and I have done for years is weekly meal prep to stay on top of our health and fitness goals. Eating healthy, soy- and dairy-free, plus managing my weight is SO much easier when I have my food prepared.
For years when my schedule was super busy, I would spend a few hours 1 day a week cooking all my food at once and putting pre-portioned meals into containers so I was prepared all week.
But now, I usually just cook large batches of protein and vegetables to keep on hand in the fridge so I can throw together a quick and delicious meal any time. Either meal prep option is great, you just have to find what method fits your lifestyle.
Having these prepped foods ready to go is especially helpful because I often practice carb cycling, meaning some days I eat low carb, higher protein, and fat, and then other days I eat regular macros of higher carb, higher protein, and lower fat.
But no matter what your eating preference is, meal prep of some sort is super beneficial because you can control what you eat and it saves you money because you aren’t eating out all of the time—bonus!!
Lately, I’ve been pretty much cooking all my protein, such as chicken, pork tenderloin, and beef brisket, in my 8 quart Instant Pot and all my veggies, like zucchini, yellow squash, and carrots, in the air fryer. Chris has even joined in on the new meal prep fun because it is so easy and delicious, and we love not having to do a ton of clean-up after.
Here are 4 examples of meals I create with Instant Pot salsa shredded chicken:
The 2 meals below are examples of similar lower-carb day meals I often make that are bursting with flavor and keep me full for several hours.
Meals 1 & 2: I add 5-6oz of salsa shredded chicken, air-fried zucchini, cauliflower, and carrots, and top with walnuts, kalamata or black olives, jalapeños, and avocado, occasionally sprinkled with “everything bagel” seasoning from either Trader Joe’s or Costco 🥑. I love creating more flavorful meals because for a while, I was starting to get into a little food rut and no one likes eating boring-tasting food.


The next two meals below are examples of meals I would eat on a regular macro day as they have more carbohydrates.
Meal 1: 5-6oz salsa shredded chicken, 1 cup of jasmine rice, coconut aminos (a delicious soy-free replacement for soy sauce), air-fried carrots, zucchini, jalapeños, and 1/4 slice of avocado.
Meal 2: Sliced organic sourdough bread topped with mashed avocado, sliced tomatoes, salsa shredded chicken, and “everything bagel” seasoning. So good!!


Quick tips when making your salsa shredded chicken
The salsa in this recipe is very subtle so you’re not stuck with eating Mexican-style meals such as tacos all week if you don’t want to. I’ve actually made many different flavored dishes with this chicken, such as soups like ramen, added it to my cauliflower gnocchi, thrown it together with veggies, and topped my avocado toast with it.
Another variation I’ve made if I don’t have salsa on hand is using marinara sauce instead and Chris has also used BBQ sauce. I would suggest with both of those substitutions that you add more sauce when cooking and a little additional water, maybe 1/3 to 1/2 cup, so your Instant Pot doesn’t flash the burn warning at you.
Instant Pot Salsa Shredded Chicken:
This recipe is so easy! Find the full recipe at the bottom of the page, below the photos!
Spray the Instant Pot lightly with avocado oil. Season both sides of your chicken breasts and add them to your Instant Pot. Pour salsa over the chicken to cover most of the top of each breast. Put the lid on, close the valve knob to the sealed position, and cook on the pressure cook setting for 13 minutes.

Once your timer goes off, let the chicken sit for about 10 minutes before turning the valve to quick release. Add chicken to a plate to shred with 2 forks or this amazing claw shredder. I will usually knock off a little bit of the salsa back into the pot before I put it on the plate to shred but it’s not necessary.

Once shredded, add it back into the Instant Pot, mix with the juices, add additional salt and pepper if desired, and then let it marinate on warm setting with the lid closed for a while. If there is too much liquid, you can also turn on the sauté function for a few minutes to evaporate some of the liquid.

When ready, eat and enjoy or add to a dish to let cool then store it in the fridge for your weekly meal prep.

Depending on your salsa, there will most likely be extra liquid in the bottom of the pot. You can choose to discard this or store it with your chicken for extra flavor. Additionally, you can drain the excess liquid and add extra salsa before eating or storing if you would like even more salsa flavor. Get ready to enjoy some deliciousness!

Instant Pot Salsa Shredded Chicken Recipe
Ingredients:
3-4 chicken breasts
1/2 - 3/4 cup salsa (enough to cover most of the top of each breast)
Salt and pepper
Taco seasoning to taste, or I will use garlic, thyme, cayenne pepper, and any other seasonings that sound good
2 Tbsps water (or 1/4 cup of water if your salsa is thick and chunky)
Instructions:
Spray the Instant Pot with a little avocado oil either Chosen brand spray (or we use a misto sprayer) to coat the bottom of the pot.
Season both sides of the chicken breasts with salt, pepper, and taco seasoning blend or any other seasonings you desire. Then add chicken breasts to your Instant Pot.
Pour about 1/2 - 3/4 cup of salsa over the chicken to cover most of the top of each breast. If salsa is very chunky, add 2 Tablespoons to 1/4 cup water to your pot so you don’t set off the burn warning.
Put the lid on, close the valve knob to the sealed position. Hit the Pressure Cook button and set it for 13 minutes.
Once the timer goes off, let the chicken sit for 10 minutes before setting the valve to quick release to let the steam out.
Open the lid and remove the chicken to a plate. Shred the chicken with 2 forks or this amazing claw shredder. Once shredded, add back into the Instant Pot, mix with the juices, and add additional salt and pepper if desired. Then, let marinate on warm setting for a while until you’re ready to eat it, or put it in a dish to store in the fridge.
*** Depending on your salsa, there will most likely be extra liquid in the bottom of the pot. You can choose to discard this or store it with your chicken for extra flavor. Additionally, you can drain the excess liquid and add extra salsa before eating or storing if you would like even more salsa flavor.
I hope you enjoy this recipe as much as we do! Let me know if you have questions in the comments and tag me on Instagram at @awakenednutrition if you give it a try!! I love hearing from you!
Learn How to Stop Bloat From Happening
Want to reduce inflammation and lose fat for good? Start by downloading our free guide: 5 Easy Steps to Beating Belly Bloat!
We are Chris and Amber, a husband and wife team dedicated to helping you improve your nutritional and personal fitness habits for a better lifestyle. If you have issues with bloating, inability to lose fat, brain fog, or are in need of a proven nutrition and fitness plan to get you out of a rut, then sign up for our 30-Day Beat Belly Bloat Program today!


Pumpkin Pie Protein Mousse Spread Recipe (Soy, Dairy & Gluten-Free)
All I've been hearing lately is talk of Fall, apple picking, changing of the leaves, hot apple cider and all things pumpkin...I am 100% A-OK with this and plan to indulge in all of the Fallyness every chance I get. Actually, Chris and I have invited his mother up for a visit this weekend so we can go apple picking for the first time! At least it's this Florida girl's first time. I seem to always miss out on apple picking season so this year I was not letting the chance slip away from me.
So in honor of all things Fall-y I decided it's time to whip up one of my favorite easy yummy pumpkin recipes that I have been making for several years now as a topping for my rice cakes, pancakes, and a dip for apples. Each year, it seems to evolve and get better as I discover new ingredients that I love to use.
One of my favorite ingredients that I discovered at the beginning of the year is Pumpkin Seed Protein Powder. I had never heard of it before and so I thought I'd give it a shot. I knew that there were many benefits to including pumpkin in the diet such as it being rich in vitamin K, phosphorus, magnesium and manganese and other minerals including zinc, iron and copper and it is also great for removal of intestinal parasites...yucky sounding but totally necessary. It is also high in protein, it has only one ingredient - ground pumpkin seed - so I don't have to worry about any other unnecessary ingredients lurking in my protein, it's not chalky or gritty tasting, and it has almost no taste so it mixes really well in everything. Lastly, it's soy and dairy-free which are both foods that I avoid because of food allergies and intolerances. This protein is a WIN-WIN in my book and a constant kitchen staple for me.

The pumpkin pie protein spread over rice cakes make a great pre-workout meal as it give you the perfect amount of fuel to crush your workout which I am about to do! It's also the perfect meal to enjoy with a homemade pumpkin spice latte that I have been making with Trader Joe's delicious Pumpkin Spice Coffee, stevia, cinnamon and coconut milk creamer. It's WAY cheaper and has WAY less sugar than the PSL that is being served up at Starbucks right now.
I hope you enjoy this recipe and all the Fall-y things as much as I do! :)

Pumpkin Pie Protein Mousse Spread Recipe
- 3 Tbsps Pumpkin seed protein powder (20g of protein)
- 1/4 pumpkin purée - NOT pumpkin pie mix
- 2-3 Tbsps unsweetened almond milk
- 2 Tbsps tahini (or nut butter of your choice)
- 1/4 tsp Ceylon cinnamon or pumpkin pie spice
- stevia to taste
Mix all ingredients together and spread over rice cakes, pancakes or as a dip for apples.
Note: If you don't need as much protein, you can make this recipe without the protein powder or cut the protein in half and use less almond milk. It tastes delicious either way!

Sources:
http://www.naturalhealth365.com/natural_healing/parasites.html
Disclaimer: We earn a small commission if you use the highlighted links to purchase the products mentioned in this post. We recommend only products that we would use in our own home or that we would recommend for our clients. Your purchases help to support our blogging activities such as creating yummy recipes to share with you and also helps us to bring even more helpful nutrition and training information to you on a weekly basis. Thank you for your continued support and for helping us continue what we LOVE to do!
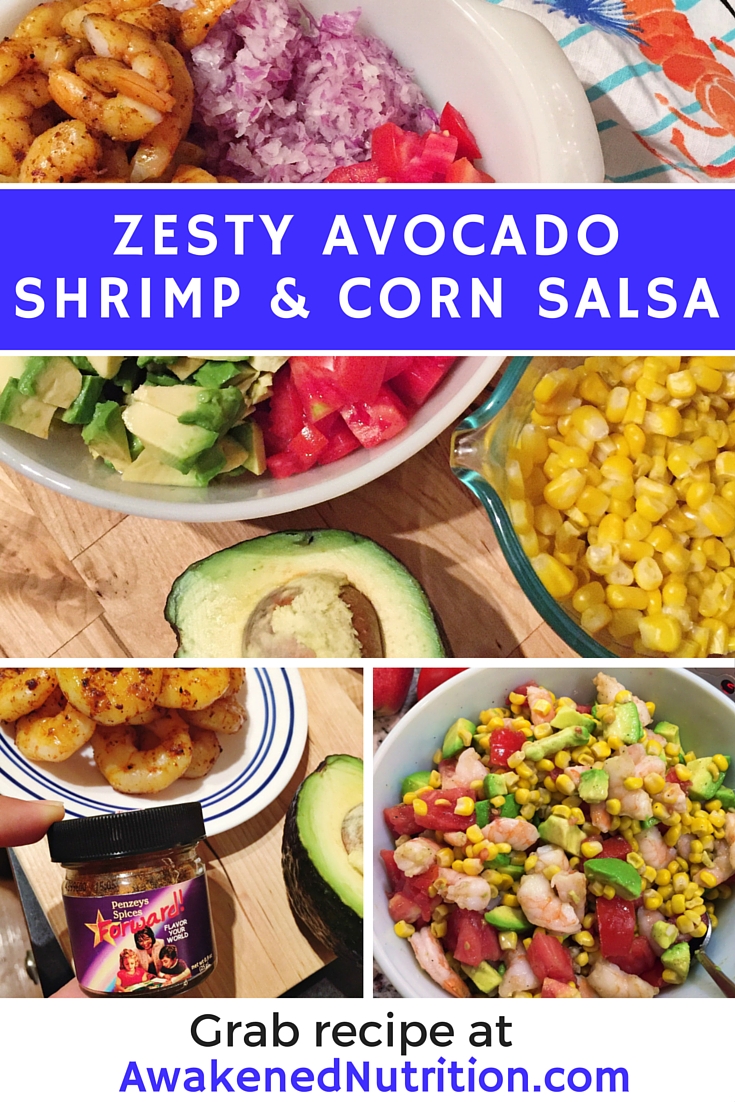
Zesty Avocado Shrimp and Corn Salsa
Summer is almost upon us and that means the BBQ invites will be rolling in soon! Instead of bringing a dish that will make you feel junkie after, bring a healthy dish that everyone will LOVE and will allow you to stay in line with your health goal.
One of our favorite recipes that we have made over and over is this zesty avocado shrimp and corn salsa. Anytime we make it for parties, it gets rave reviews. It’s also super simple to make so you don’t have to worry about a laborious process when you have no time.
It's a great recipe because you can change it up each time by adding or taking away ingredients and it tastes delicious every time! We love to make ours a little spicy and with extra pink salt. :) You can enjoy the shrimp salsa over a salad, as a taco on a corn or brown rice tortilla, or on a simple organic corn tortilla or cassava flour chip like Siete.
I realize that not everyone can eat corn these days so I have included some swaps for corn below. Maybe you have some other favorite veggie ingredients that would taste amazing in this salsa mix. I would love to hear what amazing things you come up with so make sure to keep me posted in the comments below.
Let’s break down why this dish is so healthy:
It’s high in protein
Rich with healthy fat from the avocado
Packed with vegetables
Contains lime which is great for your digestion

Zesty Avocado Shrimp and Corn Salsa

1/2 to 3/4 lb or 1.5 cups raw medium size shrimp, peeled/deveined
1 Tbsp coconut oil for shrimp sauté
2 cups organic frozen sweet corn
1.5 cups Roma tomato, chopped
1 cup red onion, finely diced
1 cup avocado, chopped
1 lime or lemon juiced
Salt and pepper to taste
1/2 - 1 tsp Penzey’s forward spice or use any other spiced seasoning of your choice such as cayenne, chili and cumin powder to taste
Additional ingredients that could be added for extra flavor or substitutions:
Fresh Cilantro
Red or green pepper instead of corn
Chopped zucchini instead of corn
Jicama instead of corn
Instructions
In a sauté pan, heat a tablespoon of coconut oil over medium or medium-low heat. Add peeled shrimp, salt, pepper and forward spice to taste. Sauté a couple of minutes on each side until shrimp is pink and no longer translucent. Once done, set aside to cool. Once cool, chop shrimp into small chunks.
Defrost frozen corn in either the microwave or on stove top with a little water. Drain and set aside to cool.
Chop your avocado and Roma tomatoes into small cubes and dice red onion finely by hand or in a food processor. I used the Cuisinart Mini Food Prep.
Juice your lime or lemon.
In a large bowl, add all prepared ingredients, extra salt, pepper and forward spice and mix thoroughly.
Place in fridge for 5-10 minutes to cool and serve with either organic tortilla chips or corn tortillas. Enjoy!


Disclaimer: We earn a small commission if you use the highlighted links to purchase the products mentioned in this post. We recommend only products that we would use in our own home or that we would recommend for our clients. Your purchases help to support our blogging activities such as creating yummy recipes to share with you and also helps us to bring even more helpful nutrition and training information to you on a weekly basis. Thank you for your continued support and for helping us continue what we LOVE to do!
Easy Scrambled Avocado Ham Egg Cups
We are always looking for ways to make our lives easier while using the best possible ingredients to keep us healthy and stay in line with our personal health goals. One thing we do often is prepare our breakfast meals at the beginning of the week especially if we have a busy week ahead of us. An easy breakfast to make are these scrambled avocado ham egg cups. They are great when you are on the go and don’t want to sacrifice taste! Plus they take care of your protein and fat needs so all you have to do is cover your clean carbohydrate and you have a complete meal! Chris loves to make a big batch of oatmeal ahead of time for the week and I am more of a sweet potato gal so I will roast sweet potatoes in the oven. This recipe only calls for 6 eggs which will last about 3 days at 2 egg cups per serving. If you want to make egg cups for the whole week, just add 2 extra egg cups per mix or you can just double the recipe. Also, you can use different ingredients in each egg cup if you really want to have variety throughout the week! Try to use organic ingredients when you can to avoid GMO’s and harmful pesticide residue on your food. Enjoy and let us know what egg cup combinations you come up with!

Scrambled Avocado Ham Egg Cups
2 Egg Cups Per Serving
- 6 organic pasture-raised eggs (1 egg per muffin cup)
- 1 medium organic plum tomato, diced
- 1/3 avocado, chopped
- 6-10 sliced low sodium, sliced ham (larger ham slices work best)
- Salt and pepper to taste, cayenne pepper if you are really feeling saucy!
- Pre-heat oven to 375 degrees.
- Grab a muffin pan that holds at least 6 cups. With a paper towel, apply coconut oil to all sides of each tin cup to prevent sticking.
- In a bowl, scramble your egg mixture with salt, pepper and any other seasonings you'd like. Use 1 egg for each egg cup you plan to make, so if you make 12 egg cups, you need 12 eggs.
- Place ham into muffin cups to form a bowl. If your ham slices are smaller like mine were, then use 1 1/2 slices of ham by cutting ham slices in half and place one slice on the bottom of the cup and the other two slices around the sides to form your bowl.
- Place avocado slices and diced tomato into each egg cup then pour scrambled egg mixture into all of the egg cups.
- Bake for 20 minutes or until no longer runny. Enjoy!
What's your favorite egg and veggie breakfast combination?

Homemade Gluten-Free Flatbread Bun (also, nut-free!)
I have been mostly gluten-free for a few years or so now because of the nasty effects that gluten can have on ones gut and physical health and I really haven't found any gluten-free bread replacements that I can really stand behind. Mostly because of their long list of ingredients and the GF breads that I do approve of are just so darn pricey. So I have cut out all types of homemade sandwiches and wraps over the years and since they haven't been on the menu for so long I don't really miss them very often...BUT from time to time I get a hankering for one.
I've tried making some coconut flour breads in the past but they usually called for a ton of eggs because coconut four is super dense and I just can't eat eggs in large quantities without having respiratory issues. Plus I could never really get them to hold together enough to make a sandwich with. So recently during my 28-Day Beat Belly Bloat group program, myself and others shared a couple soy, dairy, gluten and egg-free tortilla and na'an recipes using different flours like quinoa, almond and tapioca flour. I tried several of my own recipe variations with other fours I had on hand but they just never came out quite right. Then I used tapioca for the first time and noticed how amazingly you could create a bread-like bun using only a few ingredients. So after several experimental recipes I have settled on a delicious gluten-free flatbread bun made of brown rice an tapioca flour.
I've enjoyed the bun with both chicken breast and a burger patty topped with tomato and avocado and the bun has stayed intact every time. Not only does it stay intact while eating the whole sandwich but it also travels well to make sandwiches at the beach or on a picnic. Best of all it tastes buttery delicious!
I have this sandwich about one meal a day as this is by no means a low carb sandwich as it has about 43g of carbohydrates. So don't go crazy and eat three of them once you taste how yummy they are! The great thing is it's void of all the junk ingredients that most processed packaged gluten and gluten-free breads have which makes your body happier and healthier!

Gluten-Free Flatbread Bun
- 1/4 brown rice flour
- 2 Tbsps tapioca flour
- 1 tsp extra virgin olive or coconut oil
- 1/4 cup water
- Salt to taste, I use a lot for flavoring
- Pre-heat a flat pan to medium heat.
- In a small bowl, mix dry ingredients. Slowly stir in olive oil and then water, make sure it does not become too liquidy. If it the mix does look too runny, add less water.
- Spray the pan lightly. I use a misto oil sprayer to avoid soy and chemicals. Pour liquid out into 2 round flat pancake like circles.
- Cook for 2-3 minutes on the first side until the bun starts to slightly brown. Then flip and cook the other side for 1-2 minutes. Let cool and enjoy with your favorite protein and toppings.
Tips for travel: If you don't plan to eat the sandwich right away, let the bun cool first then wrap it in a paper towel and put it in a ziplock bag. The paper towel may stick to the bun but it will remove easily.


Disclaimer: We earn a small commission if you use the highlighted links to purchase the products mentioned in this post. We recommend only products that we would use in our own home or that we would recommend for our clients. Your purchases help to support our blogging activities such as creating yummy recipes to share with you and also helps us to bring even more helpful nutrition and training information to you on a weekly basis. Thank you for your continued support and for helping us continue what we LOVE to do!

Guiltless Chocolate Chia Pudding
Do you ever have those days when all you want is a delicious chocolate treat but you are agonizing over it because you are trying to lose a couple pounds? Well agonize no more because I am going to share a guiltless Chocolate Chia Pudding recipe from our 10-Day Spring Detox to bust those cravings! You will actually want to gobble this treat up because it is loaded with rich nutrients and antioxidants! Chia seeds contain healthy fats like Omega-3's, protein and fiber to help keep you full and keep things moving smoothly, and antioxidants which protect your body from free radicals. Raw Cocao also contains antioxidants and has more than 300 phytochemicals, including vitamins, minerals, and nutrients such as: fat, carbohydrates, fiber, iron, zinc, copper, potassium, phosphorus, calcium, magnesium, and sulfur.
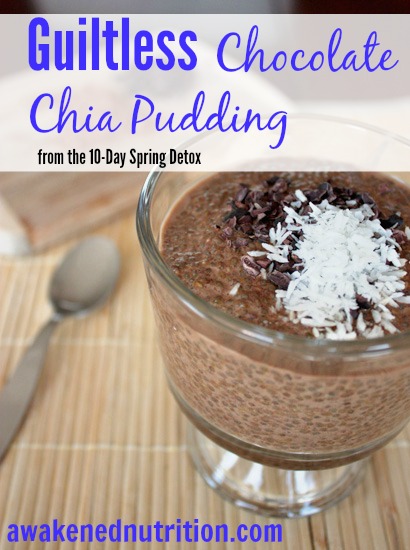
Chocolate Chia Pudding - Serves 3-4
1 1/4 cups unsweetened almond or coconut milk 1/4 cup chia seeds 1 tablespoon raw cacao powder 1 tsp cinnamon to taste 1/2 teaspoon pure vanilla extract 1/2 tablespoon raw honey or a few drops of stevia
1. Combine all ingredients well with a whisk and pour into a glass jar with lid. Shake it up and mix further if there are still clumps in the bottom.
2. Refrigerate for at least 4 hours, stirring once an hour to keep from clumping
3. Serve topped with dried fruit, sunflower seeds, cacao nibs, or unsweetened shredded coconut.
What's your favorite guiltless dessert?
