Let's Get Soy Out of Our Foods: Girl Scout Cookies
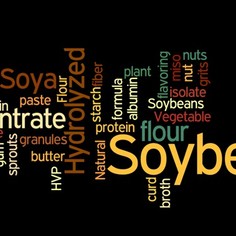
Did you know that soy is one of the top 8 food allergens in the US today and is in nearly every processed food on the shelves today? Girl Scout Cookies being one of them!!
Now, I am not promoting Girl Scout Cookies in any way, but it is a big business that provides funding for a great program for growing young girls. If we could all work together to get soy removed from these cookies, it would bring awareness to the unnecessary use of soy in our foods and possibly start a trend among other companies who might do the same.
Please take a second to sign Subtract Soy Now's petition to to ask Girl Scouts of the USA to remove soy from Girl Scout Cookies.
Thank you so much for your support!
xo
Amber
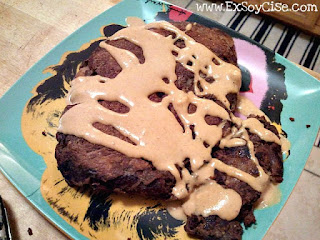
Chocolate Pear Protein Pancake (soy, dairy & grain free)
- 1 scoop protein powder - I use Vitol Egg White protein powder - Vanilla Ice Cream Flavor
- 1/2 sliced organic pear
- 2 tbsp almond flour
- 1 jumbo egg (yolk included) and 1 egg white
- 1 tbsp coconut flour
- 1 tbsp unsweetened cocoa powder
- 1/2 tsp cinnamon
- Sweetener of choice - I used 8 drops of liquid stevia
- 1 tsp baking powder
- a splash of water
Nutritional info:
Fat: 14g
Calories: 420g
Carb: 32g
Protein: 43g
Sugar: 10g
(The top of the pancake is drizzled with PB2 peanut butter, nutritional info is not included for PB2)
*The nutritional breakdown is an estimate based on the specific ingredients that I use in my recipes. The breakdown for your recipe may vary slightly depending on the ingredients that are used.
Living the Good Life! My Before and After
Last week I was thinking a lot about how far I've come with my diet and training over the past couple years. I went from eating a lot of processed foods, soy and dairy products, candy, heavy on the booze and barely stepping foot into the gym to cutting out ALL processed foods, soy, dairy and candy, going very lite on the booze (about once a week) and hitting the gym hard with weight training and a little cardio 5 to 6 days a week.
I thought it would be fun to put up a side by side comparison shot of unhealthy Amber (May 2009) and super healthy Amber (August 2011). For all the girls out there who are afraid to lift weights because they are scared to look "manly" and will "bulk up", the proof is in the protein shake, YOU WILL NOT! The only thing that will happen is you will become leaner, stronger and have the body you always dreamed about. A clean diet consisting of lean meats, complex carbs, veggies and good fats along with weight training and cardio will beat an unhealthy lifestyle every time! I will never regret the day I was introduced to weight lifting and I will never look back!
xoxo
Amber
Egg Beaters vs. Real Eggs
My Favorite Things: Amazon.com Deals and Steals
Since Thanksgiving has passed and everyone is in the shopping spirit, I thought I would share some of my favorite amazon.com deals on health related items that I purchase on a regular basis. I am all about saving money when I can, so I do my best to find the best savings possible on the web.
Currently, I am a amazon student Prime member which is $39 a year ($79 a year for non-students) and includes unlimited free 2 day shipping on all items that offer Prime shipping. Most all of my purchases either qualify for Prime shipping or I will use the subscribe and save option which usually gives you a 15% discount and free shipping on your item. This option is great because you can choose how often you want to receive your items (i.e. every month, two months, six months, ect.) and the subscriptions can be cancelled at any time.
The supplements I've listed below are ones I currently use and are products that have worked for me personally. Enjoy!
 |
| Vitol 100% Egg Protein Powder $28 + $4.99 shipping at amazon.com |


Pumpkin Protein Muffin and Loaf Recipe! (Grain, Soy & Dairy Free)
For the past couple months, I've hit a major plateau with my weight loss. There has been slight changes with my body, but my measurements pretty much stayed the same. So the BF and I have been tweaking a few things with my diet to see if we could bust through this pesky plateau. I tried limiting the amount of oatmeal I was eating each day by having a very minuscule amount of oatmeal in the morning and a small amount of oatmeal baked into my protein loafs for my post-workout meal. This only left me to feel as though I was starving all day and even brought on few unnecessary benge sessions from time to time. After that didn't work, I decided to try cutting out all of the grains and replacing them with starchy veggies and potatoes to see how my body responded to that. Instead of my usual oatmeal in the mornings, I was eating either sweet potatoes or kabocha squash. These keep me full and still give me energy throughout the day. So far it has worked well, I've gone down two pounds so far and I feel great! I have no complaints as of now, so I think I will stick with this for a while and see what kind of progress I can make with this little change.
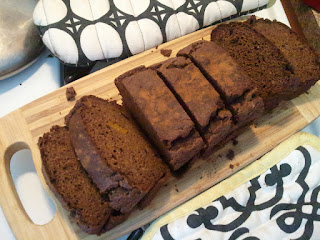
To keep up with my trial grain-free diet, I decided I needed to update my pumpkin protein loaf recipe and make a grain-free version. I replaced the oatmeal in the recipe and switched it out for almond flour and some ground flax meal. In my opinion, I think the grain free recipe tastes better then the oatmeal recipe, but that's just me!
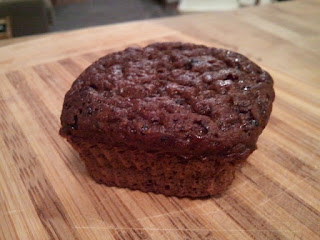
I used the same recipe to make muffins and a loaf, both turned out amazingly moist and delicious!! I even used my cute new square silicone muffin cups and it was a success!
Grain-Soy-Dairy Free Pumpkin Protein Loaf or Muffins:
Loaf: makes either 7 slices (1 slice per serving)
Muffins: makes 12 muffin cups (2 muffins per serving)
- 3 scoops protein powder - I am currently using Vitol Egg White protein powder - Vanilla Ice Cream Flavor
- 1/2 cup ground almond meal
- 1 cup egg white
- 1/2 cup canned pumpkin (not pumpkin pie mix)
- 1/2 cup unsweetened apple sauce
- 2 tbsp flax meal
- 2 tbsp unsweetened cocoa powder
- 1 tbsp of cinnamon
- 1/2 tsp of pumpkin spice
- 1 tbsp vanilla extract
- Sweetener of choice - I used 8 drops of liquid stevia
- 1 tsp baking soda
- 1 tsp baking powder
Loaf : Nutritional info for 1 slice:
Fat: 5.5g
Calories: 147g
Carb: 8g
Protein: 17g
Sugar: 2.5g
Muffins : Nutritional info for 2 muffins:
Fat: 6g
Calories: 171g
Carb: 9.5g
Protein: 20g
Sugar: 2.6g
*The nutritional breakdown is an estimate based on the specific ingredients that I use in my recipes. The breakdown for your recipe may vary slightly depending on the ingredients that are used.
Preheat oven to 350°F. Mix all dry ingredients in a bowl together. Mix wet ingredients in a separate bowl, and then mix the two bowls together. Prepare a 9x5 loaf pan OR muffin cups with non-stick spray if needed and pour in batter. Cook for 35 minutes. Let it cool enough to separate the loaf from the pan with a spatula and then place on a cooling rack. Once they have all finished cooling completely, cut loaf into 7 thick slices or pop out muffins, place in snack baggies and refrigerate or freeze. The nutritional breakdown is for either 1 slice of the loaf or 2 muffins, but depending on your goals you might need to eat 2. Bon Appétit!
Sneaky Soy List: Halloween!
Halloween night I picked up a couple large multi-packs of candy for my the office per my bosses request. I didn't indulge at all this Halloween because I didn't want to waste a cheat on naughty candy that will just leave me feeling yucky. Instead I made plenty of pumpkin protein loafs and enjoyed them throughout the night. While I watched everyone chow down on bite sized candies all night, I wondered how many of them actually contain the sneaky soy. So when I got home I jumped on my laptop and started checking some of the more well known candy manufacturer's websites. I found that a good portion of the most popular candies and chocolates had soy in some form or another listed as an ingredient (not shocking). Although I don't eat these items any longer, it is still very sad to see some of my old favorites on this list. So anyway, I thought I would make another "Sneaky Soy List" devoted to Halloween.
I hope everyone had a very happy and healthy Halloween and is now getting ready for the BIG Thanksgiving Day Feast!
Hershey's:
- Snickers Bar
- Snickers Dark
- Twix
- Mars Bar
- M&M's
- Milky Way
- Almond Joy Bar
- Heath Toffee Bar
- Reese's Fast Break Candy Bar
- Kisses Milk Chocolate Filled with Caramel
- Reese's Whipps Candy Bar
- Bliss Meltaways
- KitKat
- Mounds Bar
- Twizzlers
- Whatchamacallit Candy Bar
- Mr. Good Bar Candy Bar
- Reese's Crispy Crunch Bar
- Milk Duds
- Payday Candy Bar
- Reese's Peanut Butter Cup
- Reese's Pieces
- Reese's Nutrageous
- York Pepperment Patty
- Whopper's Malted Milk Balls
Single Serving Protein Pumpkin Pie (soy, dairy, & grain free)
Who says you can't have dessert for dinner? That is crazy talk if you ask me!
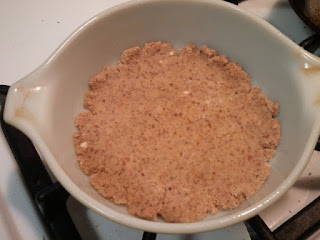
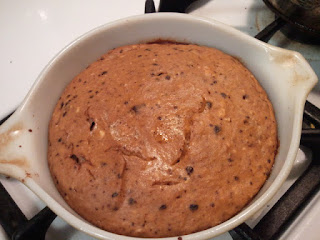
Tonight I was in the mood for a fall time dessert and it happened to be dinner time. So I thought I would use a modified version of a grain free "tortilla chip" that I made last night to eat with my guacamole and create a pie crust. The crust turned out really well, but I think it could be better if I had a non-stick pan vs. the glass pan that I used. The filling was very easy and packed with protein, just how I like it! This delicious concoction definitely cured my craving! Bon Appétit!
Single Serving Protein Pumpkin Pie:
Pie Filling:
- 1 scoop vanilla protein powder - I use Vitol Egg White protein powder - Vanilla Ice Cream
- 1/2 cup pure canned pumpkin (not pumpkin pie mix)
- 1 tbsp unsweetened apple sauce
- 3 tbsp egg white
- 1tbsp almond milk
- 1 tsp unsweetened cocoa
- stevia to taste - I used about 4 drops
- 1 tsp cinnamon (use more or less depending on your taste)
- a dash or two of pumpkin pie spice
Pie Crust:
- 2 tbsp almond meal
- 1 tbsp flax meal
- 2 tbsp coconut flour
- a dash or two of cinnamon
- a couple drops of stevia
- 2 tbsp egg whites (add more if needed so it forms into a dough)
Preheat oven to 375°F. Mix the dry crust ingredients together a bowl, then add egg whites and stir until a dough forms. Take one single serve baking dish, I used a glass Pyrex baking dish, but I think it would work best if you used a non-stick pan or baked it onto parchment paper so the crust doesn't stick to the bottom. Coat the bottom and sides of the pan with the oil of your choice. Place the ball of dough into the pan, flatten it out with your fingers until a crust is formed on the bottom of the dish. Place pan in the oven for 4-5 minutes, so the crust starts to harden.
While the crust is baking, mix the dry pie filling ingredients together in a bowl, then add the wet ingredients and mix all together. Pour the mixture over the pie crust and bake for 15-20 minutes. The time will vary depending on your oven, so keep a watchful eye on it. Once it has cooked, let the pie cool and Enjoy!
Mexican Salmon Cake Recipe
For the toppings I used a really delicious garlic salsa from Trader Joe's and I also made guacamole by mashing two avocados mixed with diced onion, jalapeno, garlic, chopped tomato, salt, pepper, and a little dash of taco seasoning.
Mexican Salmon Cakes - Makes 5-6 cakes:
- 2 - 6oz cans skinless boneless salmon in water
- 1 whole egg
- 1/2 cup egg whites
- 2 tbsp honey dijon mustard
- 1/4 cup almond meal
- 1/4 cup coconut flour
- 1/2 tsp chopped garlic
- Season to taste (I used cilantro, ginger, salt, pepper)
- 1 tbsp lemon juice
Drain salmon cans well. Mix ingredients together in a bowl. Take a small handful of the mix, roll it into a ball and then flatten slightly to form the cake. Coat your frying pan with coconut oil, cook on medium high heat for a few minutes on each side. If the sides aren't cooking as fast as the top and bottom, just put a lid over the pan for a couple minutes. These can also be baked in the oven if you prefer to use that method. Bon Appétit!
My New Love... The Kabocha Squash
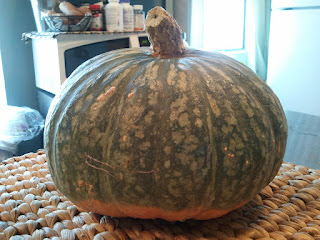
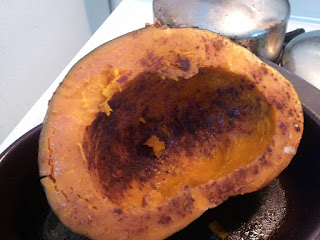
 I recently learned about kabocha squash through a status that The Fighter Diet posted on Facebook last week. She said " If more people ate kabocha instead of roasted potatoes the world would be less fat". My first thought...she is hilarious...second thought...I must try this kabocha. I ran out after work that very same night and picked one up at a market. It looks like a cute half-size green and orangish pumpkin. The kabocha squash is also called a Japanese pumpkin, so that might throw you off when looking for it at the store.
Once I got home from the market, I started searching the internet for receipes and also got some very helpful tips from some of my Facebook friends. I was told I could either slice it up into pieces and season or another method was to cut it in half and cook it upside down with a little water at the bottom of the pan. They also mentioned that the skin was very good to eat. Thank goodness they told me this, because I probably would have cut it off before eating and missed out on all that goodness. I tried both options and both came out delicious. The taste is like a mix between the butternut squash, a pumpkin, and a sweet potato, luckily these happen to be three of my favorite things!
I like the squash because it is very filling and it's helped to reduce the grains I was eating in the morning. Instead of oatmeal in the morning for breakfast, I've been eating kabocha drizzled with a little liquid stevia or sugar free maple syrup and walnuts. I also eat just the slices as a snack and used the squash (without the peel) mixed with pumpkin for one of my protein pumpkin loafs.
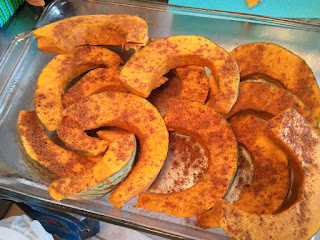
Here is what I did... I cut the squash half with a heavy duty knife (you will need to use your muscles for this one). I cut one half in to thick slices, sprinkled them with cinnamon, and placed them into 9 x 13 inch pan sprayed lightly with olive oil. I left the other half whole, sprinkled it with cinnamon, and cooked it upside down in a separate baking dish with a little water. Baked for 30 to 35 minutes at 350°F. Bon Appétit!
My Favorite Things: Square Silicone Baking Cups!
 !! In the past couple weeks I've had so much baking success with my soy/lactose free protein muffin and loaf recipes, that I decided I should reward myself with some new baking tools! I've wanted these cups for so long, but I couldn't find them anywhere around NYC. Last week I finally purchased them on amazon.com
 for only $9.99 with free shipping through my Amazon Prime account. But before purchasing them I read all the reviews to make sure I was getting a quality product (I am a crazy review reader). The only negative comment that came up more than once was that they were a little hard to clean. This wasn't the case for me, they washed up just fine with soap and water. So far I have baked two batches of muffins, both which came out perfectly! I am really looking forward to getting creative with more protein muffins, mini desserts, and egg cups...the possibilities are endless!
Pumpkin Walnut Protein Loaf Fall Recipe
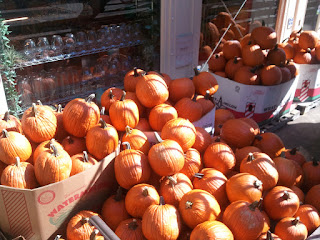
We are now a little over halfway through October and I am loving the Fall! Seeing all the pumpkin stands around the New York City has definitely pumped up my baking creativity! I have come up with some really great fall inspired soy and dairy free protein loaf/muffin recipes and I am really excited to share them with you! Enjoy and please give me feedback on the outcome!
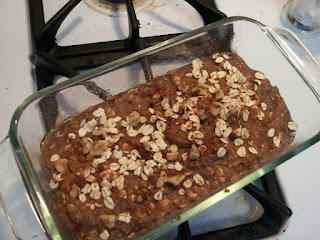
Pumpkin Walnut Protein Loaf - makes 7 slices - serving is 1 slice:
- 3 scoops protein powder - I am currently using Vitol Egg White protein powder - Vanilla Ice Cream Flavor
- 1 cup whole old fashioned oats
- 1 cup egg white
- 1 cup canned pumpkin (not pumpkin pie mix)
- 1/4 cup chopped walnuts
- 1 tbsp unsweetened cocoa powder
- 1 tbsp of cinnamon
- 1/2 tsp of pumpkin spice
- 1 tbsp vanilla extract
- Sweetener of choice - I used 1/2 tsp liquid stevia
- 1 tsp baking soda
Nutritional info for 1 slice:
Fat: 3.8g
Calories: 150g
Carb: 13g
Protein: 15.5g
Sugar: 1.5g
*The nutritional breakdown is an estimate based on the specific ingredients that I use in my recipes. The breakdown for your recipe may vary slightly depending on the ingredients that are used.
Preheat oven to 350°F. Mix all dry ingredients in a bowl together. Mix wet ingredients in a separate bowl, and then mix the two bowls together. Prepare a 9x5 loaf pan with non-stick spray if needed and pour in batter. Sprinkle the top of the loaf with a very small amount of oats, sunflower seeds, (or any other nut you'd like) and cinnamon. Cook for 35 minutes. Let it cool enough to separate the loaf from the pan with a spatula and then place on a cooling rack. Once they have all finished cooling completely, cut into 7 thick slices, place in snack baggies and refrigerate The nutritional breakdown is for 1 slice, but depending on your goals you might need to eat 2. Bon Appétit!
My Favorite Things: Organic Liquid Stevia!
 in my tea, coffee, baked goods, oatmeal, and anything else I think needs to be sweetened!
-
Check out these tips on how to replace sugar with Stevia in recipes, and also how to make a chocolate substitute.
Banana Nut Protein Loaf
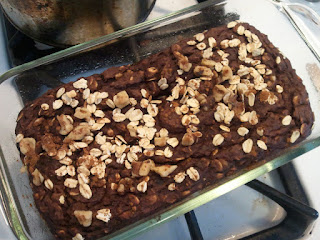
This is a fun little recipe I made before heading out to the gym yesterday. I realize that there are going to be days when I just don't have time to make a delicious mouth watering protein pancake, so I have been experimenting with different recipes that will allow me to make a batch of protein snacks for on the go. These babies will last me about 4-5 days. I have them pre-packed in baggies in my fridge, so I can just grab one and head out the door!
Banana Nut Protein Loaf - Serving is 1 slice:
- 3 scoops protein powder - I am currently using Naturade Non-Soy Veggie protein powder plain (vanilla or chocolate would be delicious too)
- 1 cup whole old fashioned oats
- 1 cup egg white
- 1 banana
- 1/2 cup unsweetened apple sauce
- 1 tbsp unsweetened cocoa powder
- 1 tbsp of cinnamon
- 1/2 tsp of pumpkin spice
- 2 tbsp ground flax seed
- 1 tbsp vanilla extract
- Sweetener of choice - I used 1/2 tsp liquid stevia
- 1 tsp baking soda
Nutritional info for 1 slice:
Fat: 4.5g
Calories: 140g
Carb: 12g
Protein: 12.5g
Sugar: 2g
*The nutritional breakdown is an estimate based on the specific ingredients that I use in my recipes. The breakdown for your recipe may vary slightly depending on the ingredients that are used.
Preheat oven to 350°F. Mix all dry ingredients in a bowl together. Smash banana in a separate bowl and mix with remaining wet ingredients, and then mix the two bowls together. Prepare a 9x5 loaf pan with non-stick spray if needed and pour in batter. Sprinkle the top of the loaf with a very small amount of oats, walnuts, and cinnamon. Cook for 30-35 minutes. Let it cool enough to separate the loaf from the pan with a spatula and then place on a cooling rack. Once they have all finished cooling completely, cut into 8 thick slices, place in snack baggies and refrigerate The nutritional breakdown is for 1 slice, but depending on your goals you might need to eat 2. Bon Appétit!
 |
 |
Cinnamon Apple Protein Muffin Recipe
This week Angelique Kronebusch over at MuscleBombshell.com posted a great recipe for Apple Protein Muffins. I loved that it was a super easy recipe with a short list of ingredients that I already had lying around the house. I made modified version yesterday by adding a few extra ingredients, and by accident, I doubled the egg white amount (not sure what I was thinking when I picked up the 1 cup measuring scoop thinking it was a 1/2 cup). I was scared that the muffins were going to be too fluffy because of the extra egg white, but they actually came out really delicious! So here is my Apple Protein Muffin recipe inspired by MuscleBombshell...Thank Angelique!
Cinnamon Apple Protein Muffins - Serving is two muffins:
- 2 scoops protein powder - I am currently using Naturade Non-Soy Veggie protein powder plain, but vanilla or chocolate will work wonderfully
- 1 cup whole old fashioned oats
- 1 cup egg white
- 1 cup unsweetened apple sauce
- 1 tbsp unsweetened cocoa powder
- 2 tsp of Cinnamon
- 1/2 tsp of Pumpkin spice
- 1 tbsp vanilla extract
- Sweetener to taste - I use 8 drops of liquid stevia
- 1/2 tsp baking soda
- 1/4 cup of water
- 1 apple cut into small chunks
Nutritional info for two muffins: Fat: 1.75g Calories: 136g Carb: 17g Protein: 12g Sugar: 5g *The nutritional breakdown is an estimate based on the specific ingredients that I use in my recipes. The breakdown for your recipe may vary slightly depending on the ingredients that are used.
Preheat oven to 350°F. Mix all dry ingredients in a bowl together, then mix in remaining wet ingredients and apple slices, except for a about 12 slices to add to the top of muffins. Prepare a 12 cup muffin pan with paper or foil liners. Spoon equal amounts of muffin mix into each liner. Place remaining apple slices on the top of the muffins and sprinkle with a little extra cinnamon. Cook muffins for 25-30 minutes. Let them cool enough to handle and remove liners. Once they have all finished cooling completely, place in snack baggies and refrigerate. Bon Appétit!
Want recipes, meal ideas, inspiration, free goodies and more? Then sign up for my monthly newsletter and also connect with me on Facebook,Instagram, Twitter, YouTube and Pinterest!
My Favorite Things: Tan in a Can...or Bottle
Apple Cinnamon Spice Protein Pancake!
This recipe was way too good not to share!
A couple of days ago, I was on the hunt for some canned pumpkin to make my favorite pumpkin protein pancake recipe. I found the canned food aisle and right as I went to grab the pumpkin, I noticed this lovely can of No Sugar Added Apple Pie Filling. The sugar is very low, only 5g per serving, so I decided I would give it a try to shake things up. The only downside to the filling is that it is sweetened with Splenda, it would be perfect if only they would have used Stevia :) The pancake was amazing, it turned out to be one of my best yet! This was the perfect treat to get the fall season started!
Apple Cinnamon Spice Protein Pancake - 1 serving:
- 1 scoop protein powder - I am currently using Naturade Non-Soy Veggie protein powder plain, but vanilla or chocolate will work wonderfully
- 3 tbsp egg white
- 1/3 cup of Comstock No Sugar Apple Filling
- 1 tbsp unsweetened cocoa powder
- Cinnamon to taste - I use about a 1/2 tsp
- Dash of Pumpkin spice
- 1/4 tsp vanilla extract
- Sweetener to taste - I use 8 drops of liquid stevia
- Dash of baking powder - less than 1/2 tsp
- 1/4-1/2 cup of water depending on how dry the batter is
- 1/2 tbsp quinoa flour
Nutritional:
Fat: 2g
Calories: 200g
Carb: 17g
Protein: 26.5g
Sugar: 5g
*The nutritional breakdown is an estimate based on the specific ingredients that I use in my recipes. The breakdown for your recipe may vary slightly depending on the ingredients that are used.
Set your stove to medium to medium-low heat, preheat frying pan. Heat will vary depending on the type of stove you are working with. I have a gas stove, so my stove top gets very hot and cooks my food very quick. Once the pan is hot, coat pan with cooking oil of choice, I use coconut oil. Pour the batter into the pan, it will either make one large pancake or you can choose to break them up into two cakes. Cook pancakes for a couple minutes on both sides until brown, flipping once.
Oaty Walnut and Blueberry Protein Muffins!
This weekend two of my very best girlfriends coming in to town to visit, hooray! I wanted to make sure I was prepared for the long days that we would be out roaming the city, so I decided I would make a batch of togo proteiny snacks. I was going to make the same protein bar recipe that whipped up for my Hawaii trip, until I was inspired by a fun little recipe I found in the new October issue of Oxygen Magazine for a Dark Chocolate Espresso Granola Bar . I didn't make the exact recipe because I had a few ingredients I wanted to cut out and replace, but I did use their recipe as a template. Thanks Oxygen! But before I continue with the recipe, can we all agree that Amber Elizabeth on the cover of Octobers issue is looking crazy hot?? I will answer for everyone...YES!
Oaty Walnut and Blueberry Protein Muffins - Serving is 2 muffins:
- 1/4 cup walnuts
- 1 cup blueberries
- 1/2 cup unsweetened apple sauce
- 1 cup old fashioned rolled oats
- 1/2 cup quinoa flour
- 3 scoops protein powder - I used no flavor Naturade Non-Soy Veggie protein powder, but I suggest using chocolate or vanilla
- 2 tbsp extra virgin coconut oil
- 1/4 tsp baking soda
- 1/4 tsp sea salt
- 1 tsp cinnamon - add more if you love cinnamon!
- 2 tbsp unsweetened baking cocoa
- 1/2 tsp pumpkin spice
- 1 tbsp coconut nectar or agave
- 3 packets of stevia - add more if you have a real sweet tooth!
- 1 tsp almond extract
Nutritional info:
Fat: 11g
Calories: 243g
Carb: 25g
Protein: 15g
Sugar: 7g
Preheat oven to 325°F. Mix all ingredients in a bowl together. Prepare a 12 cup muffin pan with paper or foil liners. Spoon equal amounts of muffin mix into each liner. Cook muffins for 25-30 minutes. Let them cool enough to handle and remove liners. Once they have all finished cooling completely, place in snack baggies and refrigerate. Bon Appétit!
Grocery Shopping: Keeping It Easy!
Grocery shopping can be one of two things, it can either be really complicated or really easy. I prefer the really easy option as I like to save time, money, and eat things that are going to positively contribute to my health. Which option will you choose? Really Complicated: Shopping for processed foods, you will constantly have to read labels and will either stress over macro-nutrient info such as fat/sugar/calories/carbs or you are searching the LONG list of ingredients for hidden allergenic items such as soy and lactose. Because of this, you will waste the limited time you already don't have and will spend your hard earned money on food that are bad for you and will not contribute to a healthy lifestyle.
Really Easy: Shopping for fresh whole foods that either do not have a label (e.g. fruits, lean meats, veggies, nuts) or items that may have a label but don't have a mile long list of ingredients, preferably under 5 ingredients but ideally 2 to 3. This will not only save you time, but will also save you money because you will not buy naughty snacks and other items that won't contribute to your goals, and in the long run you will live a healthier life and spend less money on doctor bills and unnecessary medications.
When I go grocery shopping, I usually order my groceries online on Fresh Direct or go to a grocery store in my neighborhood. I love ordering groceries online because it is pretty easy to stay focused and not go crazy on things that I do not need and aren't on my meal plan. FD also has some pretty amazing deals on chicken and other bulk items that you can't always get at the local grocery store and as an added bonus, I can easily copy my last order and get my shopping done in minutes. I will buy a variety of veggies, salsas, and meats, that way I can make a different meal each time and don't always feel like I am eating the same thing over and over. I realize that not everyone has access to an online grocery store, but you can choose to make easy and healthy choices at any grocery store you go to and especially if you have access to a bulk store like Sam's Club or Costco. Happy and healthy shopping!
This is my shopping list that I use on a weekly to biweekly basis:
- Chicken breast
- Extra lean ground turkey breast
- Canned pink salmon - skinless and boneless
- Egg white carton
- Whole jumbo eggs
- Sweet Potatoes
- Salsa - Margaritaville brand (Sounds cheesy, but it is amazing!)
- Frozen vegetables - spinach, kale, green beans, veggie mix
- Fresh vegetables
- Tomatoes
- Old Fashioned Rolled Oatmeal
- Red apples
- Instant coffee (I love to add it into my protein shakes for an extra boost!)
- Unsweetened apple sauce
- Pumpkin Puree (Not the pumpkin pie mix)
- Almond Milk unsweetened 40 calories
Extras that I keep on hand, but I don't necessarily buy on a weekly basis:
- Cinnamon spice
- Pumpkin Spice
- Unsweetened baking cocoa
- Extra Virgin Coconut Oil
(to cook with or add to my shakes)
- Ground Flax Meal
- Liquid Stevia
- Extra virgin olive oil
- Balsamic vinegar
- Baking powder
- Almond extract
- PB2 peanut butter
- Chopped walnuts
- Unsweetened Coconut flakes
Sign up here to receive your FREE 7 day meal plan (soy, dairy & gluten free) with tips, guide and shopping list!
Sneaky Soy: Camping!
Before the trip I went to the store to buy some naughty treats for us, we wanted to do hot dogs and smores as our cheat over the weekend. Who knew it would be so hard to find soy-free bread for our turkey hot dogs and sandwiches! I literally read the label for EVERY wheat and even white bread on the entire isle long shelf. Every single sliced bread, bagel, and bun contained soybean oil and most were made with soy flour. I nearly pulled my hair out in frustration and finally gave up. I walked towards an isle that I remembered had wraps thinking we would be those weird health nut campers who had hot dog wraps, when on a random end shelf I found a few "healthy" loaves of bread. There I found a sprouted wheat bread called Fundamental Fiber, it was the one loaf in the entire store that was not made with the sneaky soy. I guess I forgot what a pain it was to find soy-free bread since I haven't purchased bread in about six months or so. I can't deny it, I did enjoy eating bread this weekend, but I definitely wont be eager to purchase it again for quite some time.
Here I have created another surprising list of soy containing products that I found while grocery shopping and out on the campground.
The Camping list:
- Bread (all varieties - white and wheat hot dog/hamburger buns, bagels, sliced bread, rolls, ect.)
- Reduced fat peanut butter
- Wheat Thins
- Graham crackers
- Kashi chocolate chip cookies
- Non-dairy creamer
- Hot dogs
- Dorritos
- 3 Musketeers chocolate bar
- Hershey's chocolate bar
- Biscuick Ready Made Pancake Mix
- Nature Valley Oats 'n Honey granola bars
- Barbecue sauce

